Now we are getting to the fun stuff. One of the next topics for my homelab series is setting up Leap. Before we can do that, we need to spin up several VMs so we have something to set up DR jobs for. This could take hours, but with cloud-init we can crank out a linux VM in a few minutes.
Prerequisites
- Download the latest CentOS 8 qcow2 cloud image here. As of right now it would be https://cloud.centos.org/centos/8/x86_64/images/CentOS-8-GenericCloud-8.3.2011-20201204.2.x86_64.qcow2
- A computer with an openssl binary (this is optional if you want to use the “default” nutanix password). Run the following command to generate a hashed password.
- openssl passwd -1 password
- A network in your Nutanix cluster with DHCP
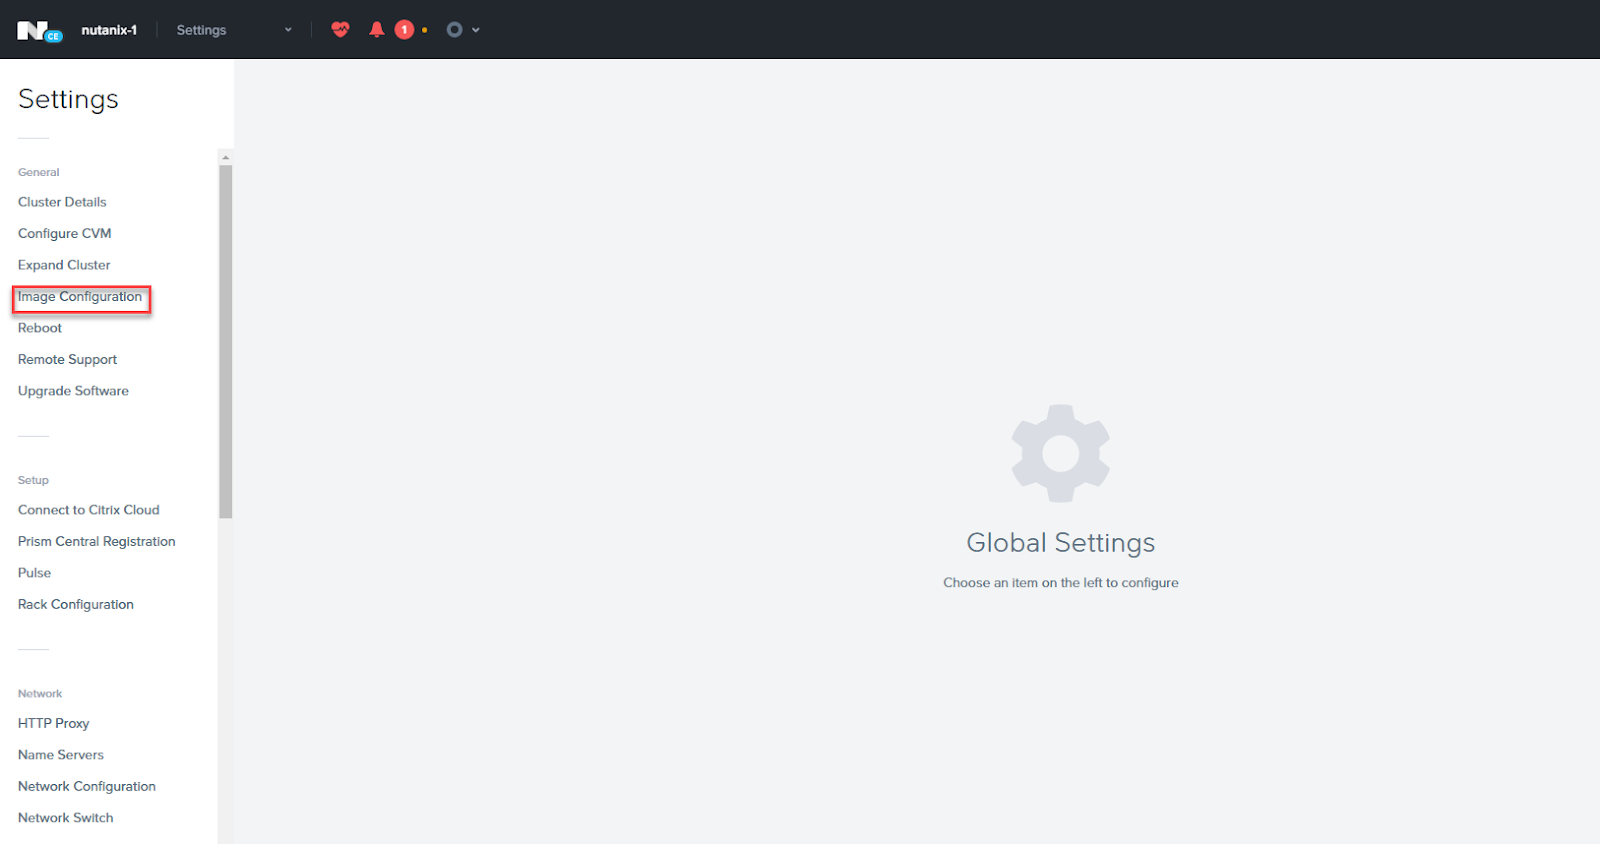
Go to settings and click on “Image Configuration”
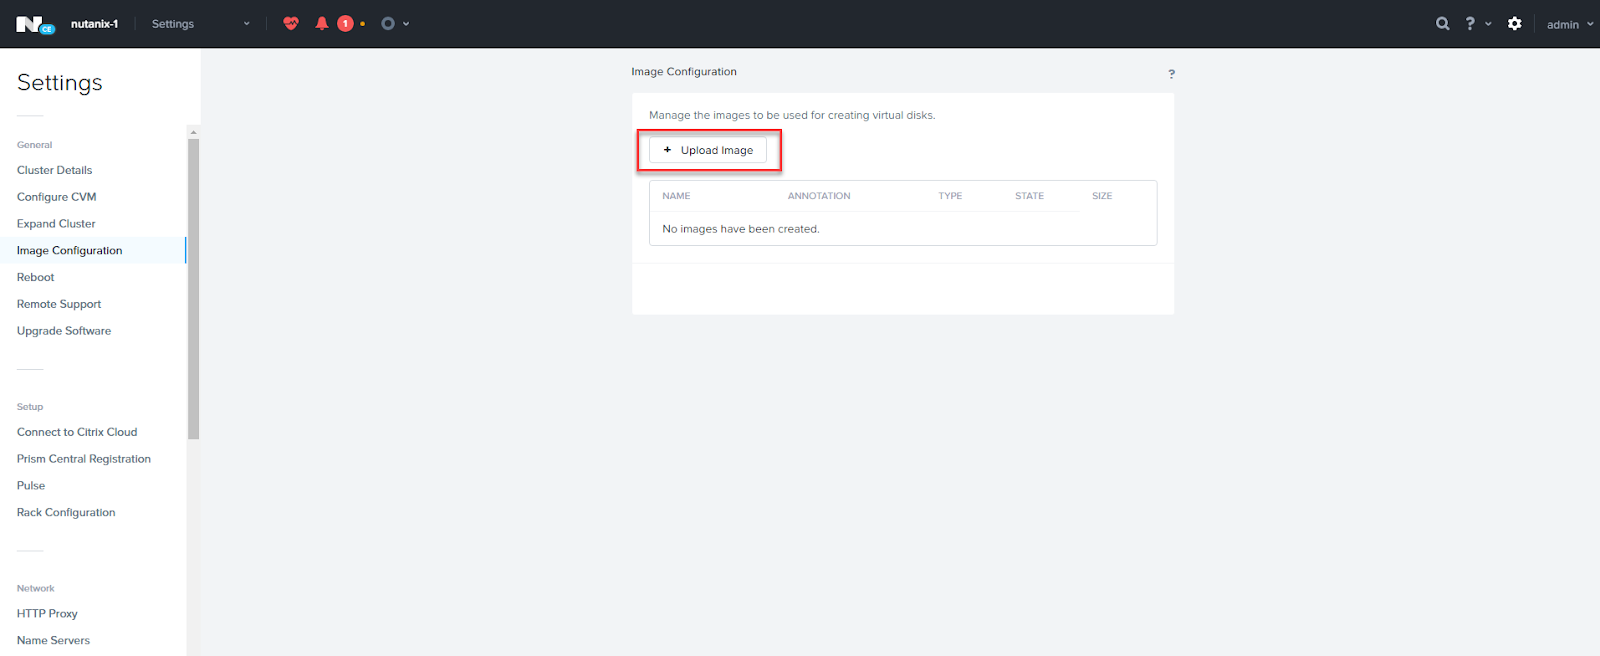
Click “Upload Image”
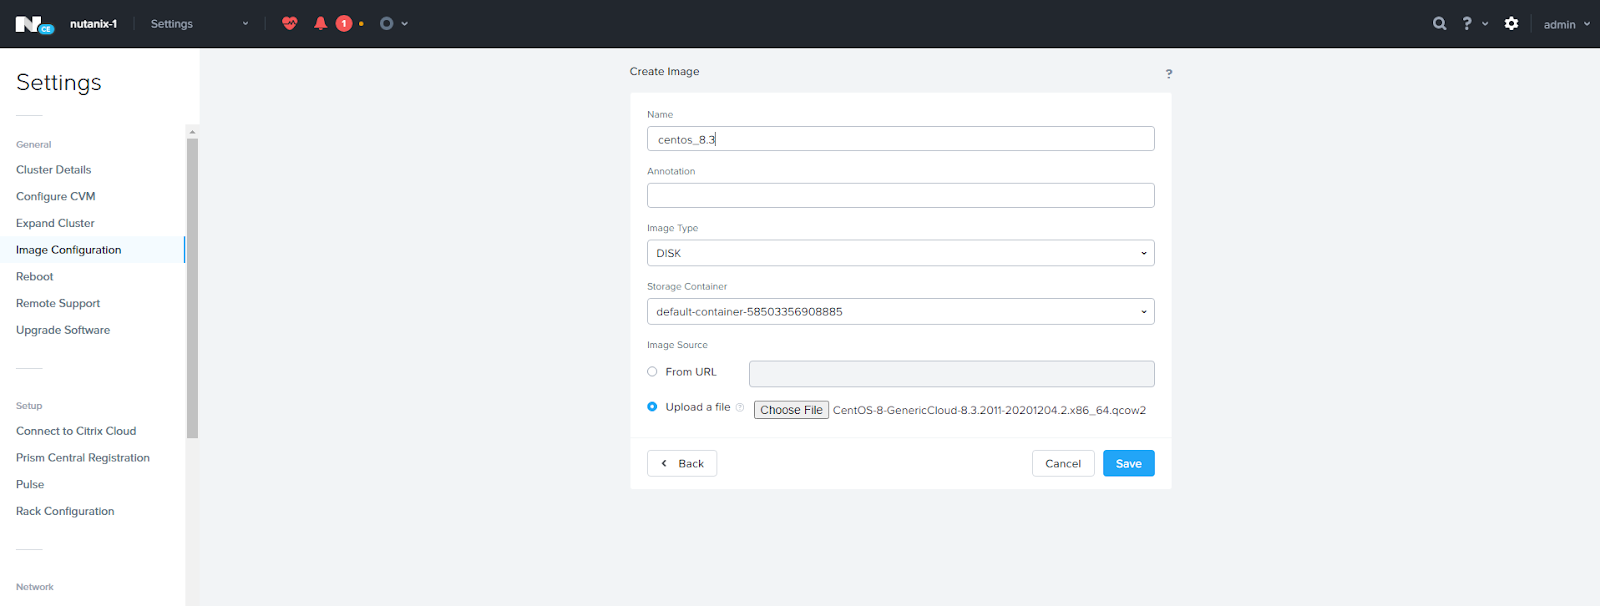
Give the image a name and be sure to select the Image Type as “disk”. Click on “Choose File” and browse to where you saved the CentOS cloud Image. Click Save and wait for the disk image to upload (it will show the status on the top of the screen).
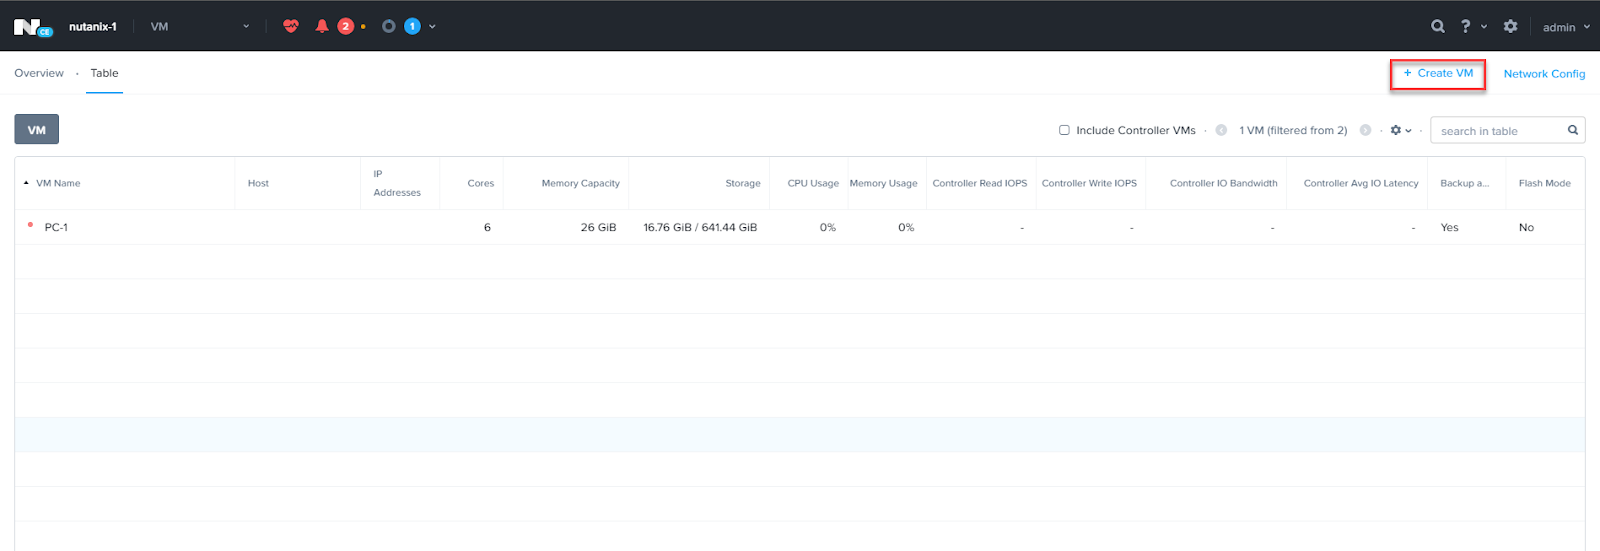
Click “Create VM”
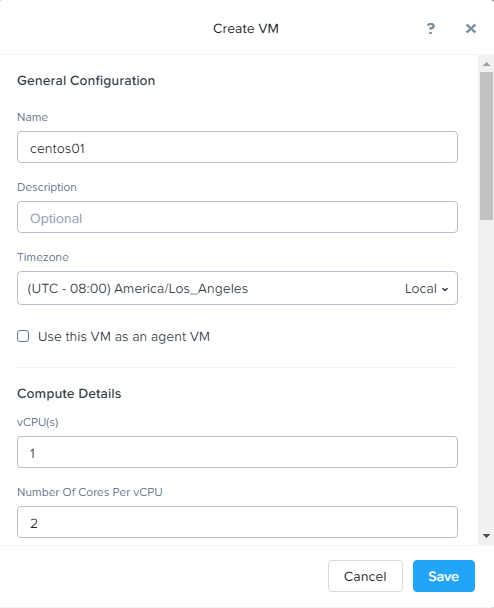
Give the VM a name. Start with 2 cores and 2GB and adjust as needed on future VMs.
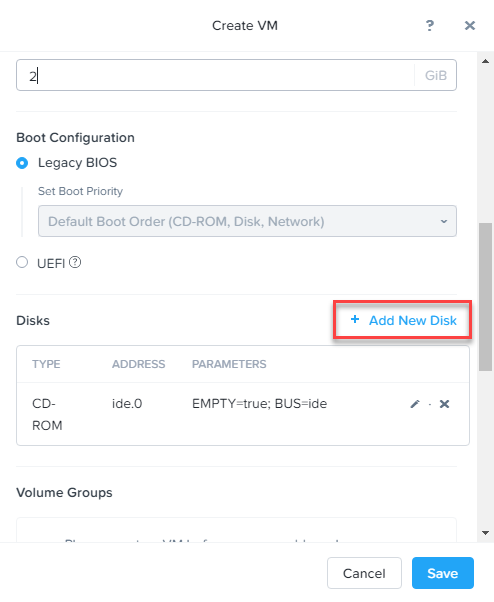
Click on “Add New Disk”
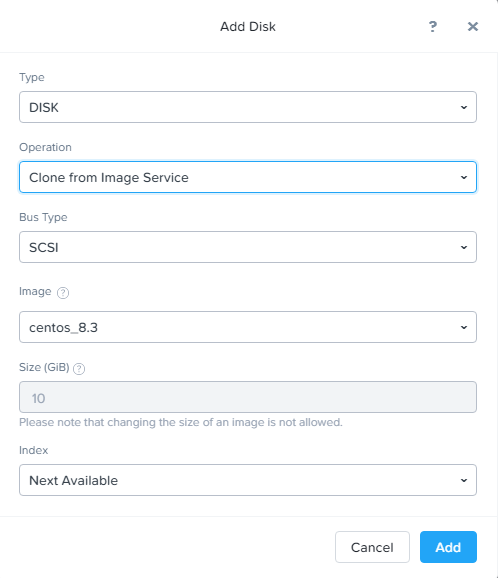
Select “Clone from Image Service” on the Operation dropdown menu. Select the CentOS image we uploaded earlier. Click Add.
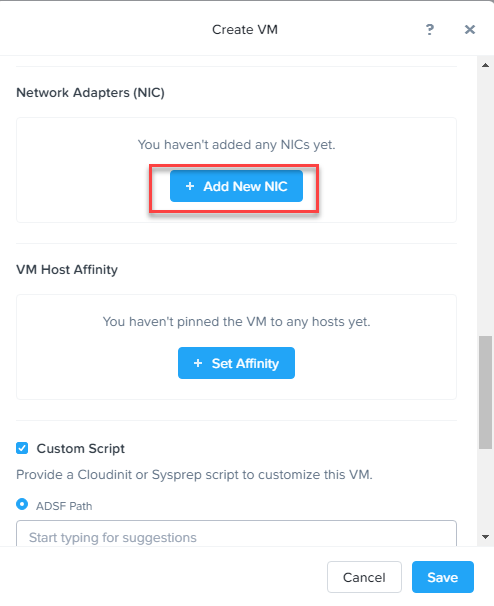
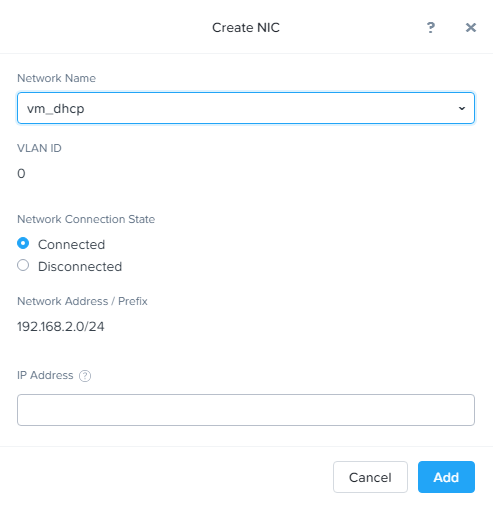
Click “Add New NIC”
Select any Nutanix subnet that has DHCP enabled in the “Network Name” dropdown menu and click Add.
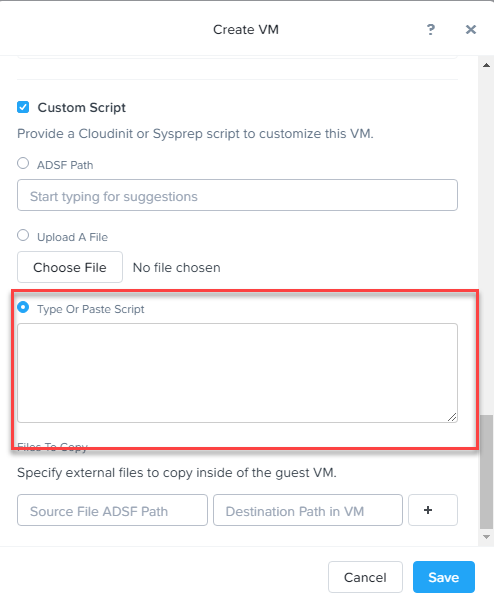
Click the checkbox for “Custom Script” and paste the following into the text box. This will set the hostname, create a user named nutanix, and set the password for the nutanix user as nutanix/4u. Click save and power on the VM.
#cloud-config
hostname: centos01
fqdn: centos01.lab.local
manage_etc_hosts: true
package_upgrade: true

users:
  - name: nutanix
    groups: wheel
    lock_passwd: false
    passwd: $1$2LS4lW9G$RitqtPCJl1lJtGLM78oLY.
    shell: /bin/bash
    sudo: ALL=(ALL) NOPASSWD:ALL
It should take about 1-2 min for your vm to boot and be available on the network. I hope you enjoyed this quick blog. Next up is disaster recovery with Leap.
Recent Comments