It has been a crazy year, but before the end of 2023 I will be sharing my experience of deploying RedHat OpenShift on Nutanix in a series of blog posts.
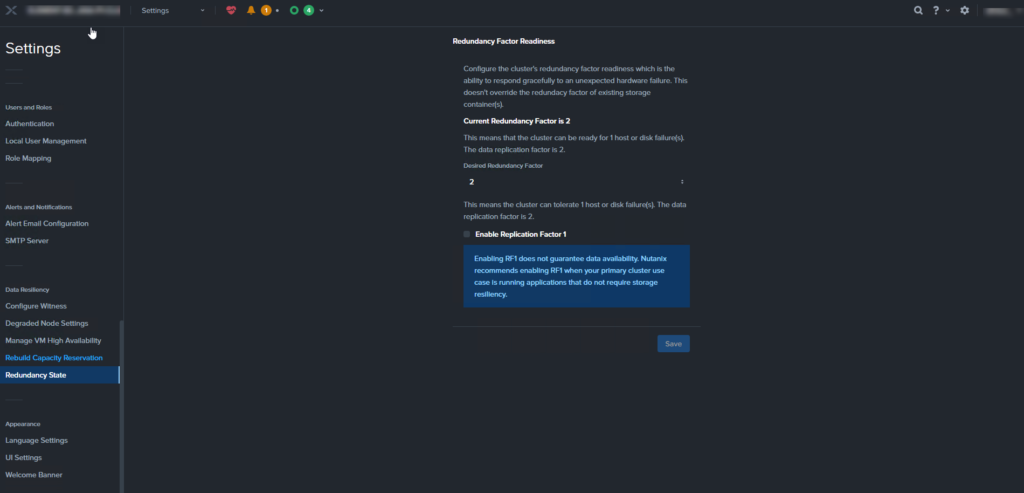
Who doesn’t love dark mode? To enable this in AOS 6.5 just go to Settings and click on UI settings. While you are in there, you might as well adjust the Session Idle Timeout since you now can have a value greater than one hour.
Now we are getting to the fun stuff. One of the next topics for my homelab series is setting up Leap. Before we can do that, we need to spin up several VMs so we have something to set up DR jobs for. This could take hours, but with cloud-init we can crank out a linux VM in a few minutes.
Prerequisites
- Download the latest CentOS 8 qcow2 cloud image here. As of right now it would be https://cloud.centos.org/centos/8/x86_64/images/CentOS-8-GenericCloud-8.3.2011-20201204.2.x86_64.qcow2
- A computer with an openssl binary (this is optional if you want to use the “default” nutanix password). Run the following command to generate a hashed password.
- openssl passwd -1 password
- A network in your Nutanix cluster with DHCP
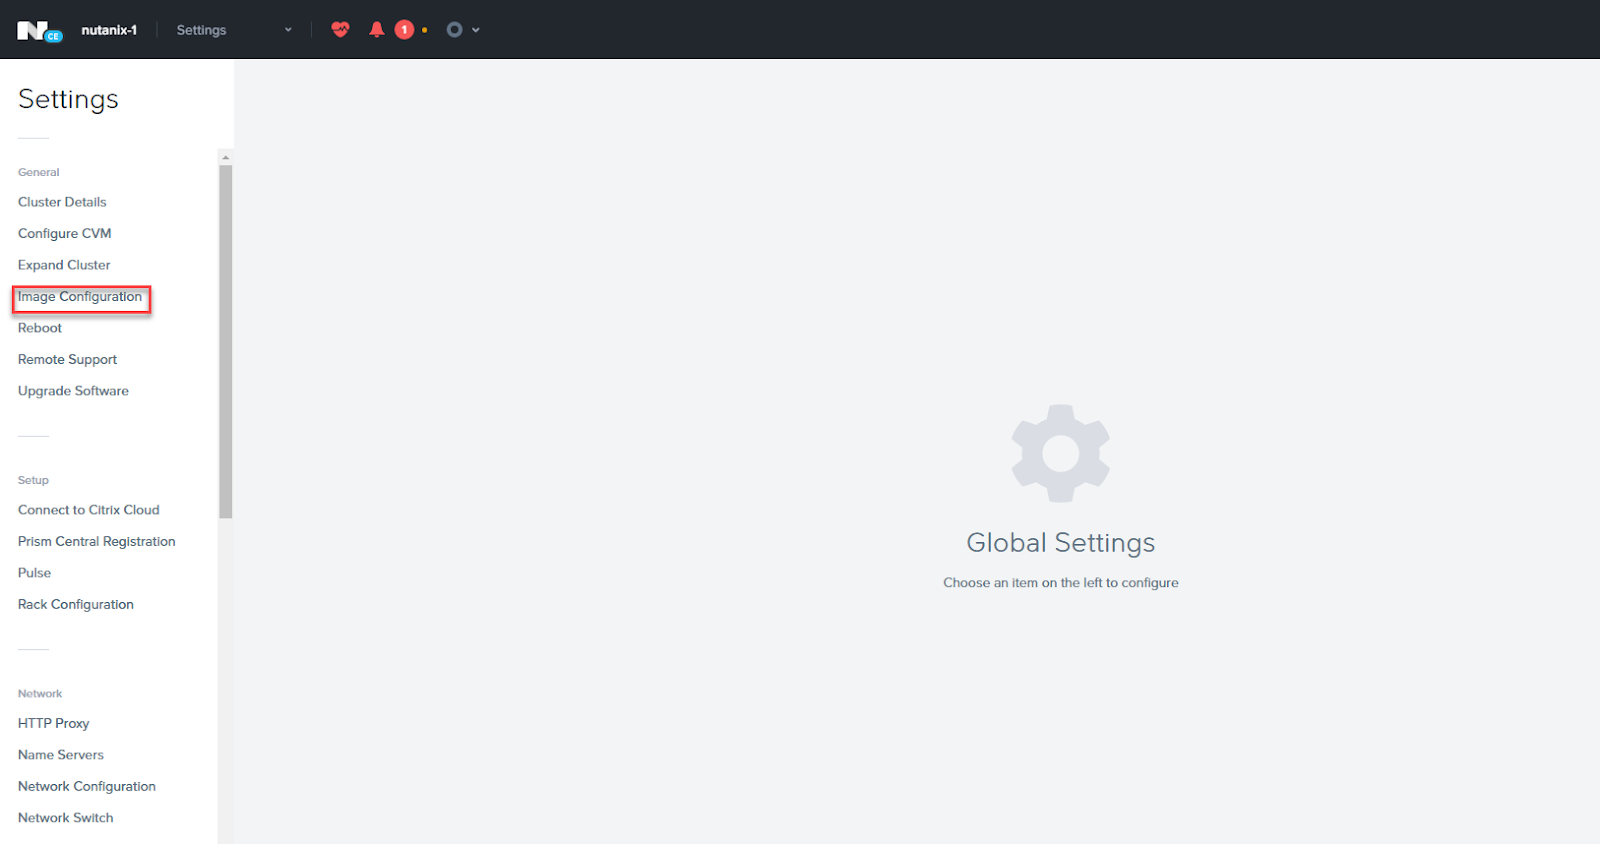
Go to settings and click on “Image Configuration”
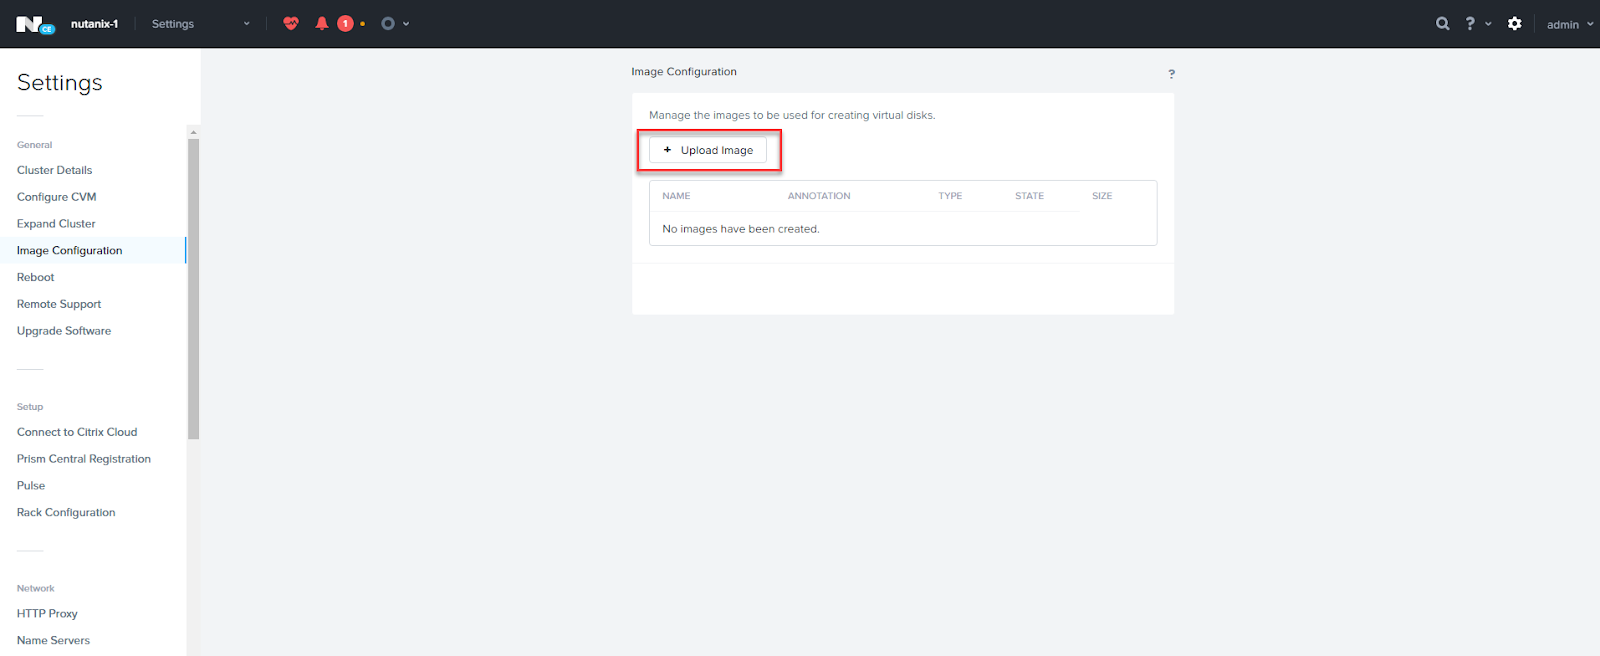
Click “Upload Image”
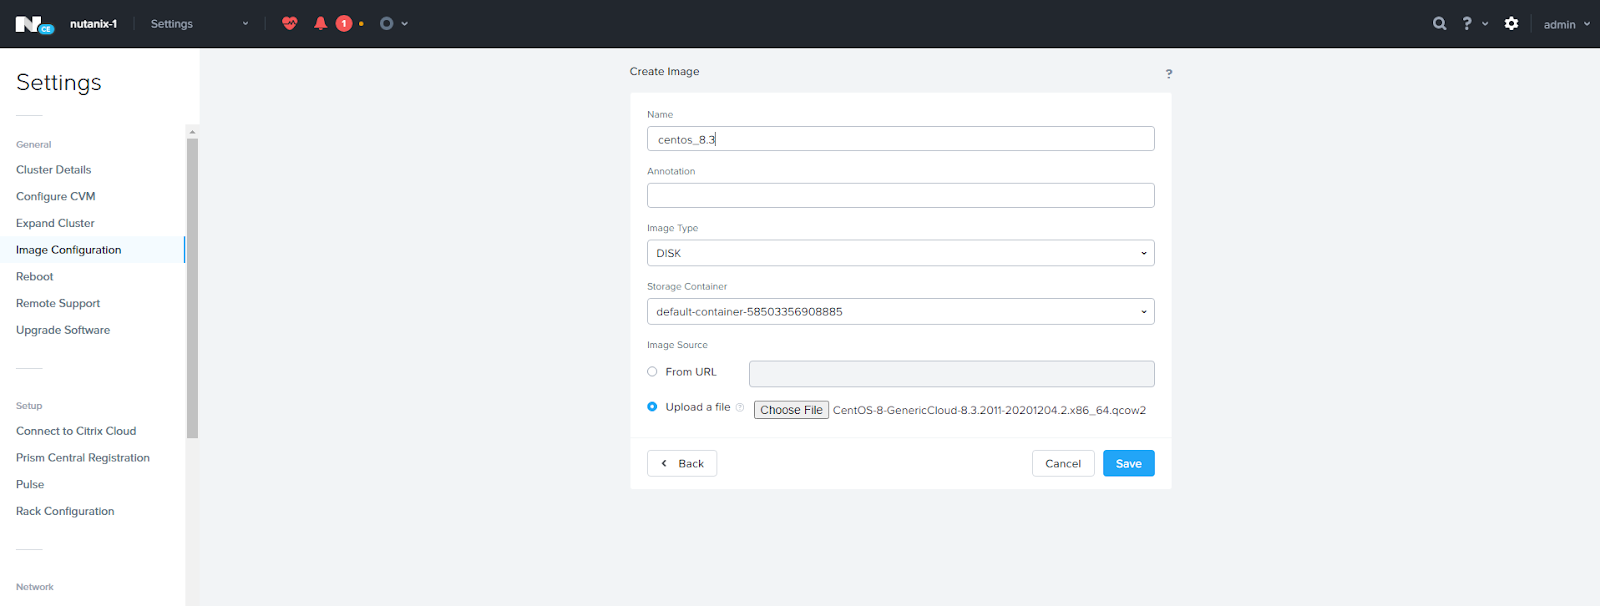
Give the image a name and be sure to select the Image Type as “disk”. Click on “Choose File” and browse to where you saved the CentOS cloud Image. Click Save and wait for the disk image to upload (it will show the status on the top of the screen).
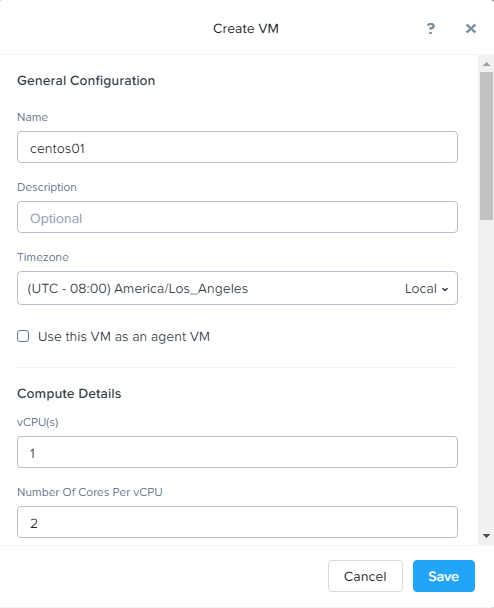
Click “Create VM”
Give the VM a name. Start with 2 cores and 2GB and adjust as needed on future VMs.
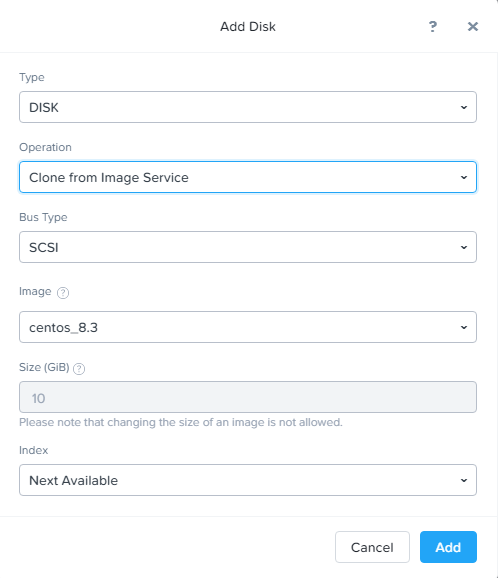
Click on “Add New Disk”
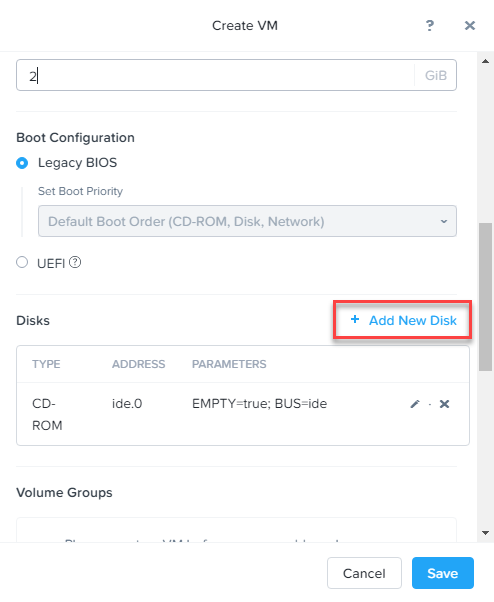
Select “Clone from Image Service” on the Operation dropdown menu. Select the CentOS image we uploaded earlier. Click Add.
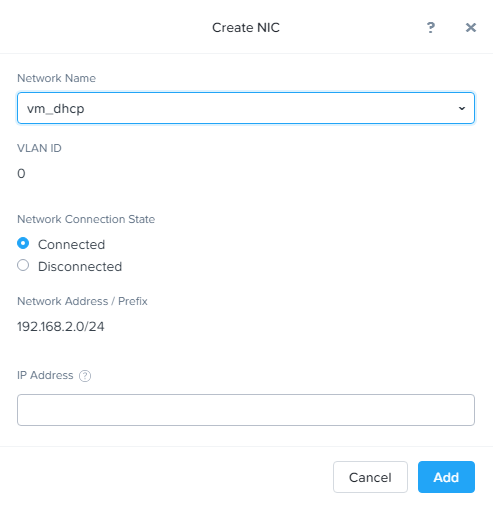
Click “Add New NIC”
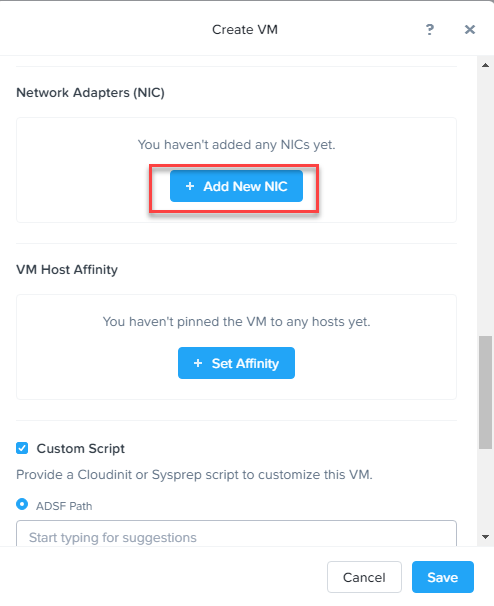
Select any Nutanix subnet that has DHCP enabled in the “Network Name” dropdown menu and click Add.
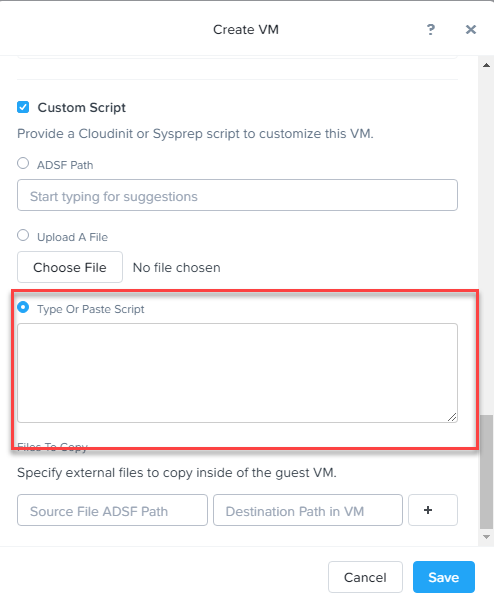
Click the checkbox for “Custom Script” and paste the following into the text box. This will set the hostname, create a user named nutanix, and set the password for the nutanix user as nutanix/4u. Click save and power on the VM.
#cloud-config
hostname: centos01
fqdn: centos01.lab.local
manage_etc_hosts: true
package_upgrade: true

users:
  - name: nutanix
    groups: wheel
    lock_passwd: false
    passwd: $1$2LS4lW9G$RitqtPCJl1lJtGLM78oLY.
    shell: /bin/bash
    sudo: ALL=(ALL) NOPASSWD:ALL
It should take about 1-2 min for your vm to boot and be available on the network. I hope you enjoyed this quick blog. Next up is disaster recovery with Leap.
We are building on my previous blog where we built a single node Nutanix cluster. If you need to check it out for reference you can find it here.
Now that we have a single cluster we need to deploy Prism Central so we can utilize all of the cool features of Nutanix like Leap (Disaster Recovery), Flow (microsegmentation, etc. You can also use Prism Central to manage multiple clusters from a single interface. We will need the following prerequisites:
- Prism Central binary and metadata json file (they are currently available here).
- 3 static IPs
- Virtual IP for your nutanix cluster
- Prism Central
- Cluster virtual IP
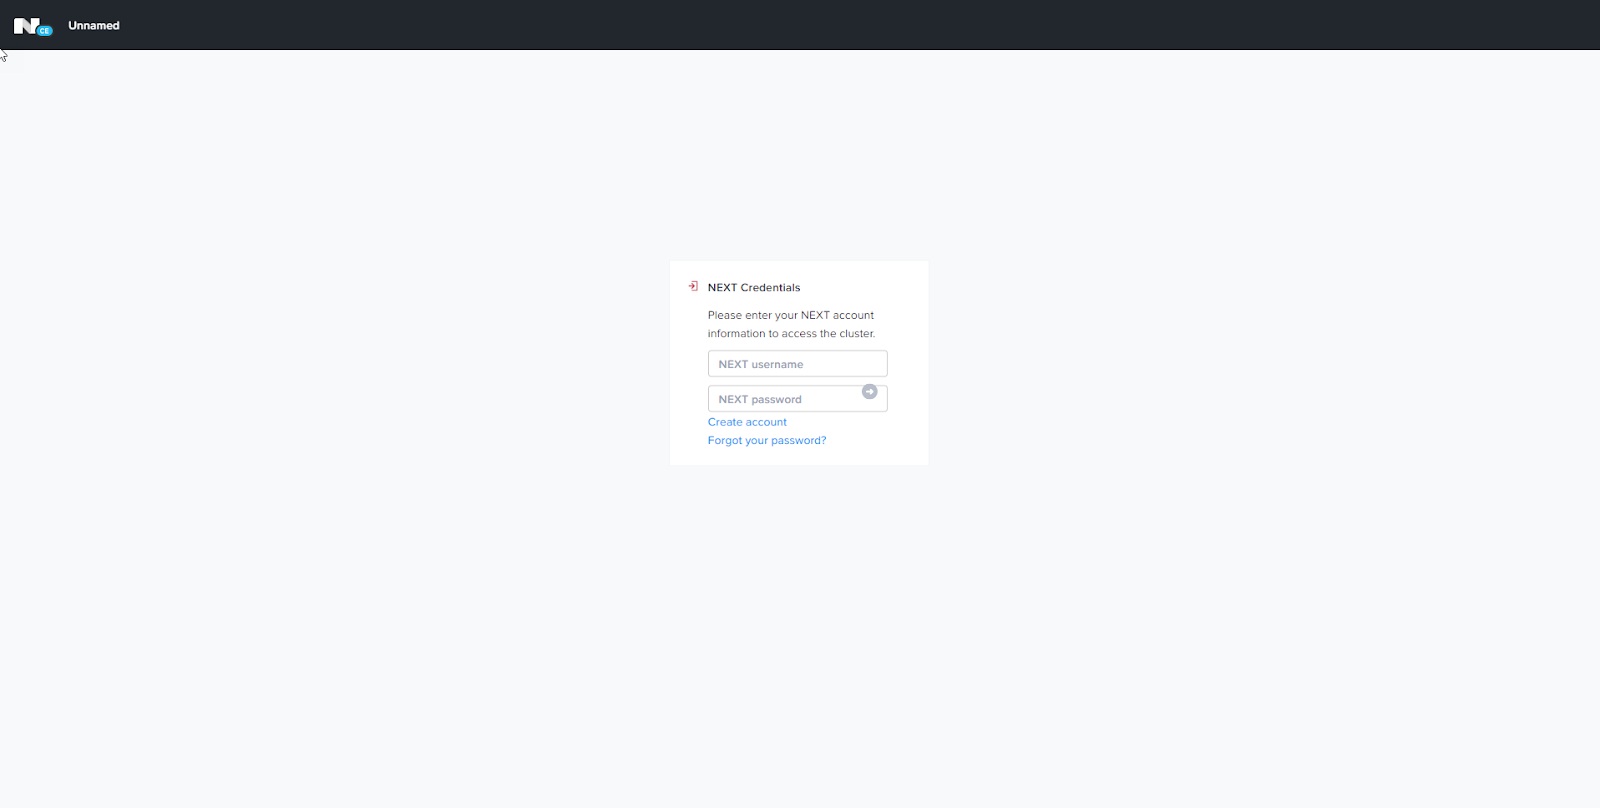
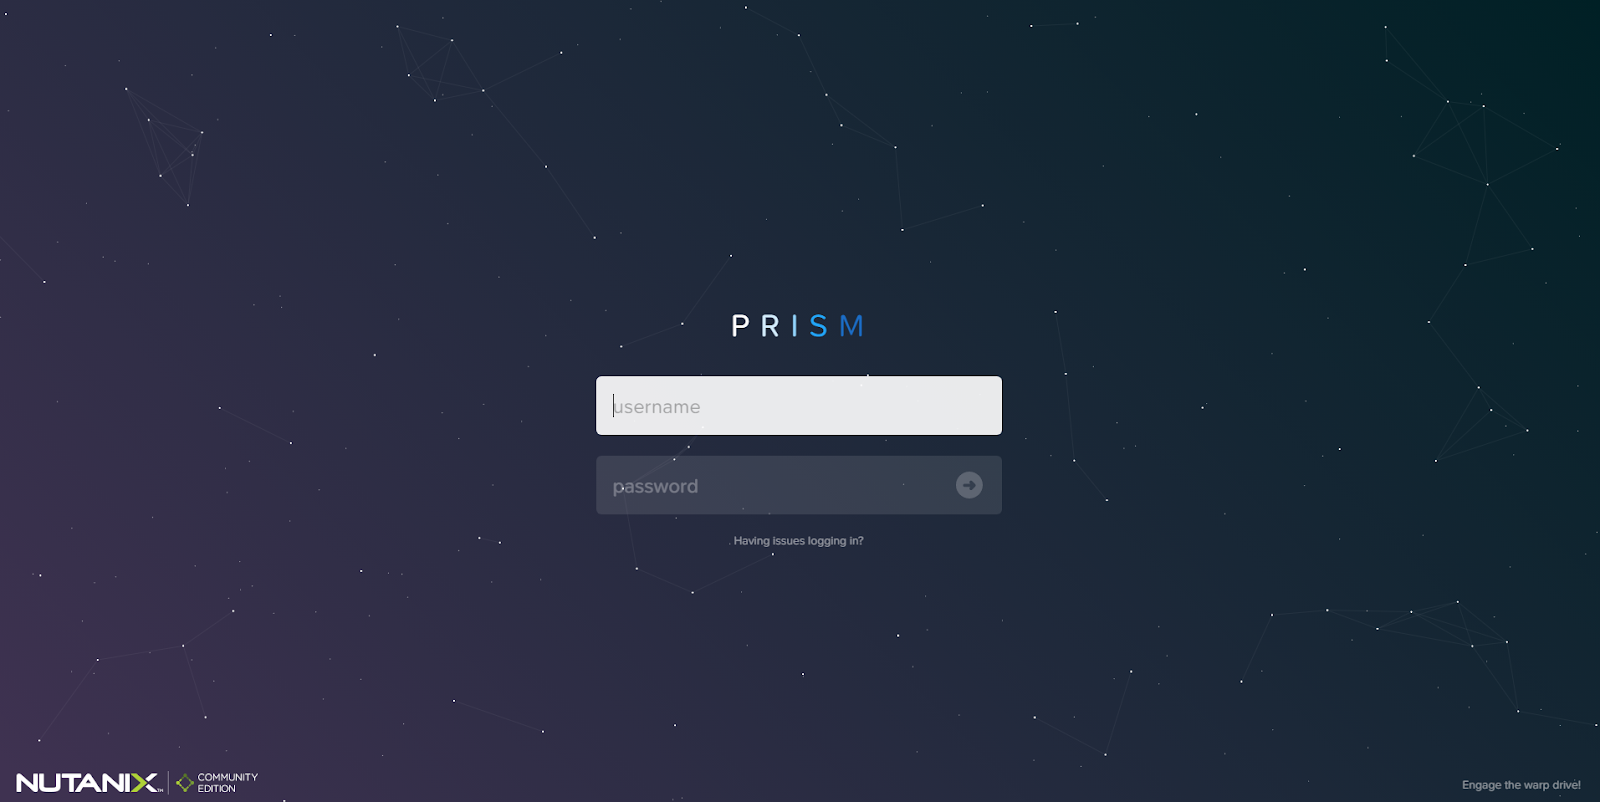
Go to https://cvm_ip:9440 (Prism Element). Login with admin nutanix/4u
Login with your NEXT account
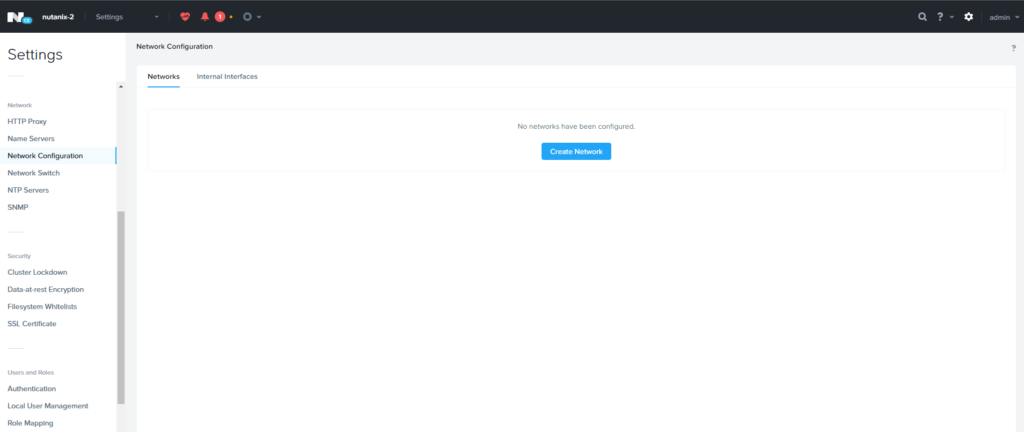
Now we need to add a network to assign to VMs. You can either click on the gear icon in the top right or hit the s key (this is a handy shortcut). Click on Network Configuration and Create Network.
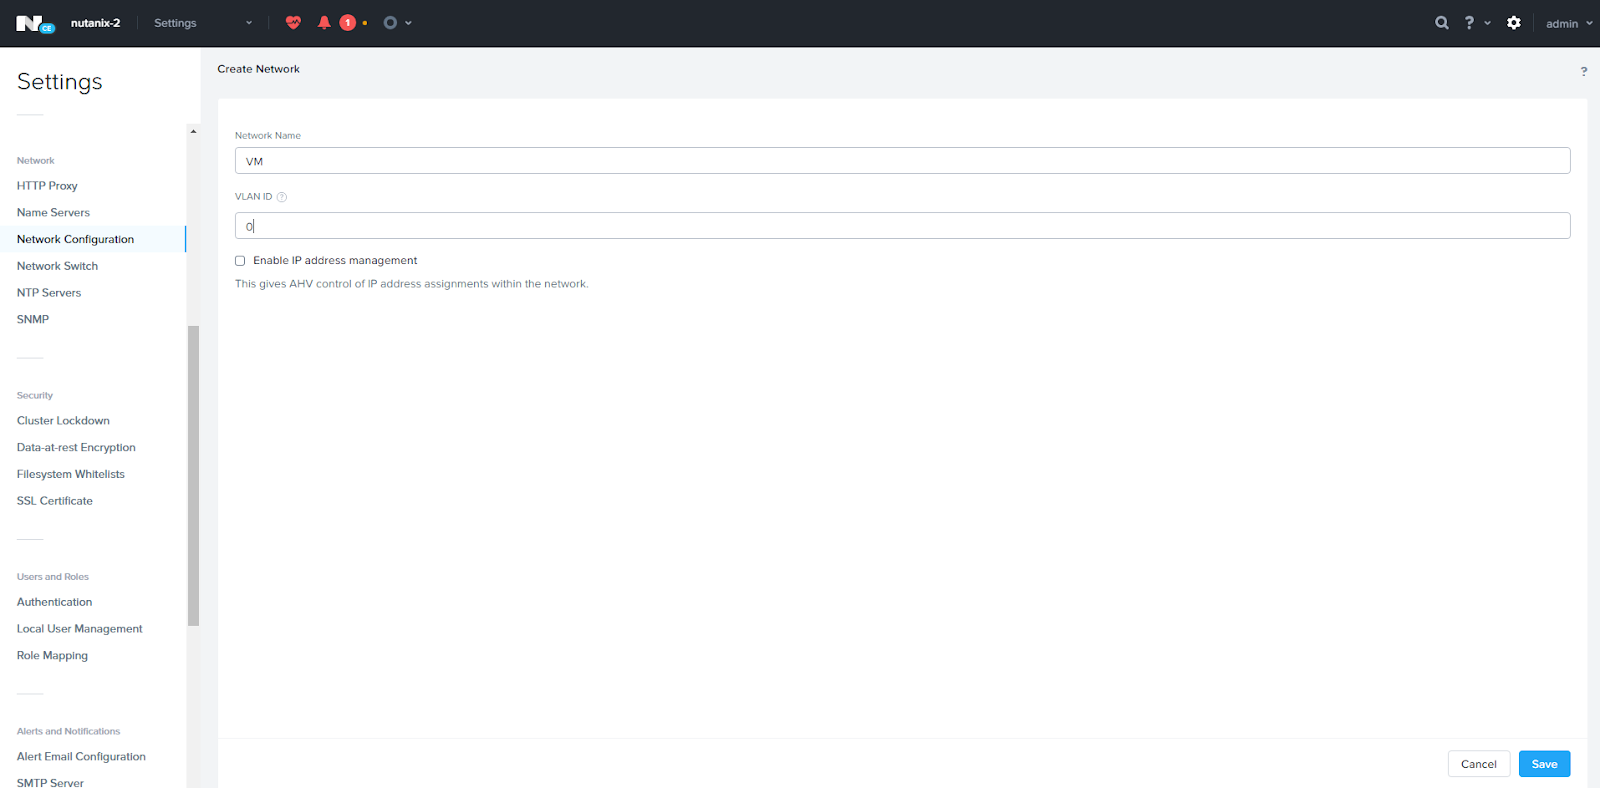
Give the network a name. Since this is in a home lab environment that is not using VLANs configure it as VLAN 0.
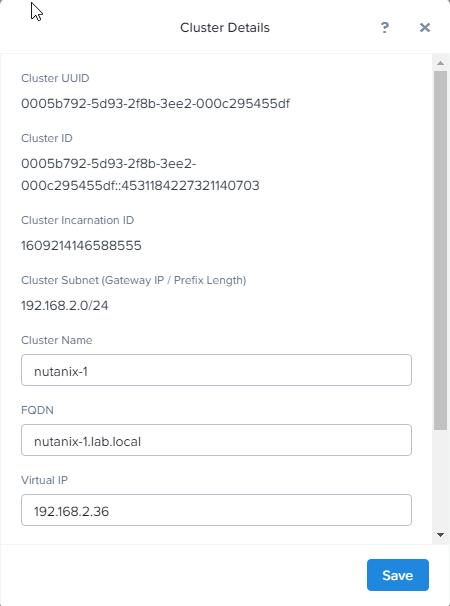
Next we are going to configure the cluster details. Click on the cluster name in the top left.

Enter in a cluster name, FQDN for the Nutanix host (look for a future blog post for setting up a lab DNS server), and a virtual IP of the cluster.
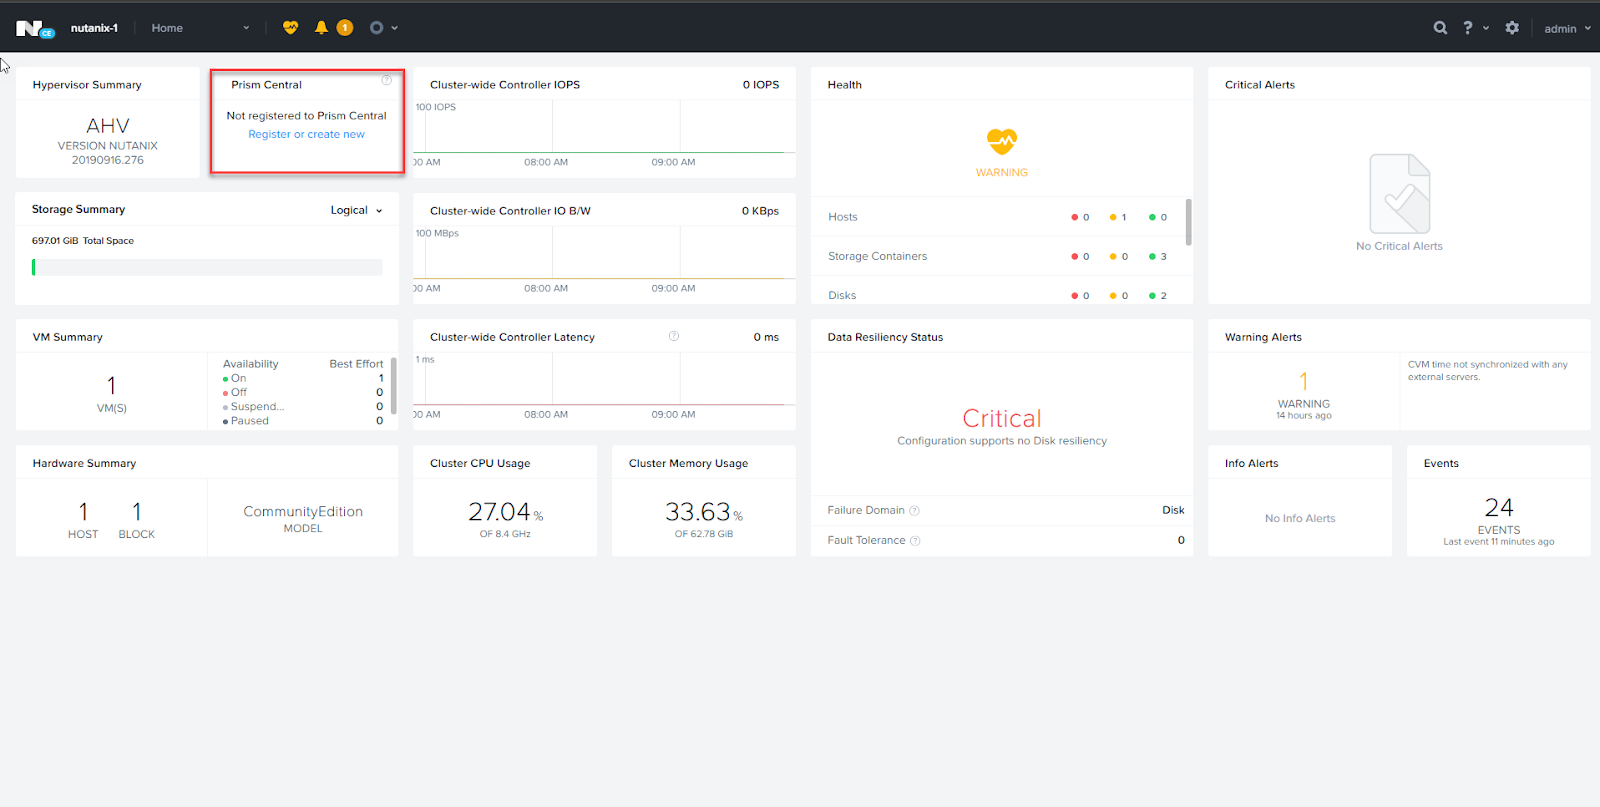
Now it is time to deploy Prism Central. Click on the Prism Central widget.
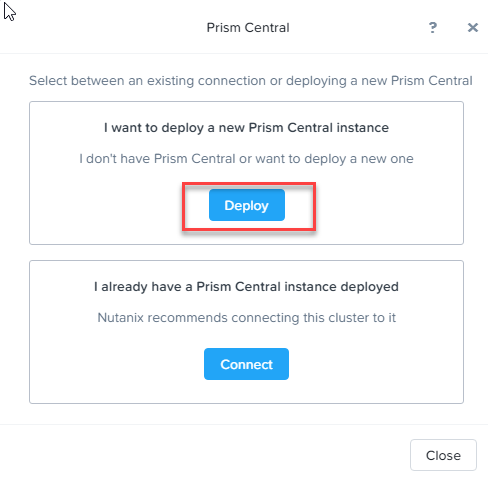
Click on the Deploy button.
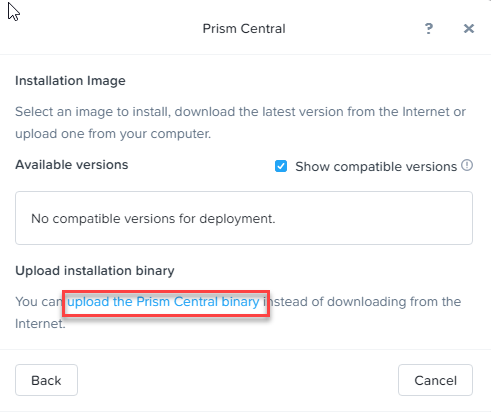
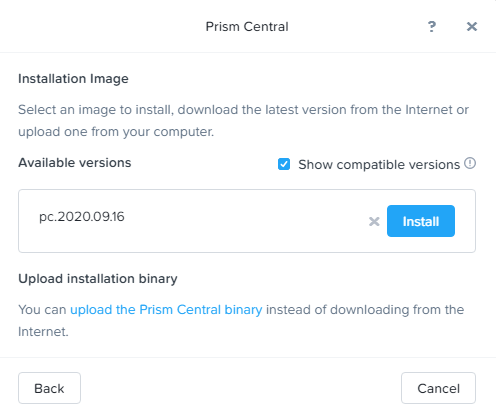
Click on “Upload the Prism Central binary link”
Click on the choose file button for both the Prism Central and Metadata and navigate to the location where you saved them in the prerequisite step.
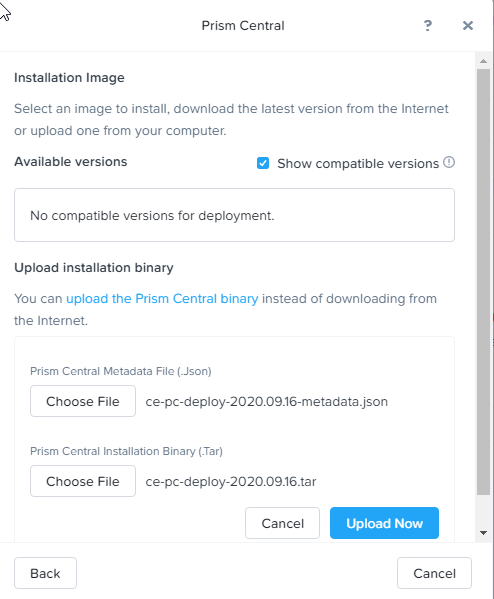
Click the Upload Now button.

Click the Install button.
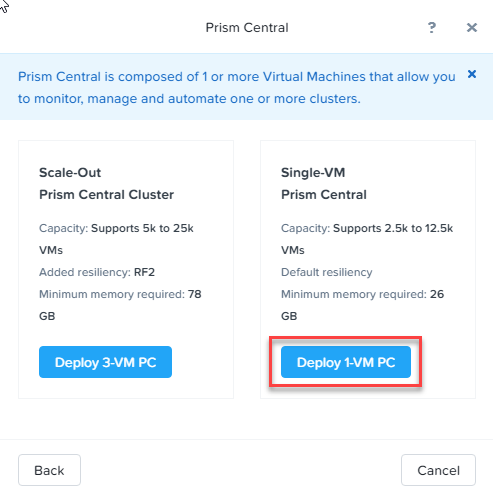
You have the option to deploy Prism Central as a 3 VM cluster or as a single VM. In this case, since we will be managing less than 30 VMs, we can select Deploy 1-VM PC.
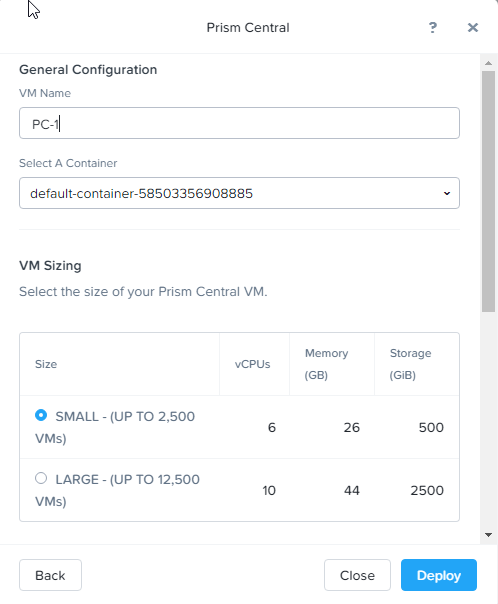
Give the Prism Central VM a name and select the storage container. In this case, the default storage container is fine. Select the small option since we won’t be deploying very many VMs.
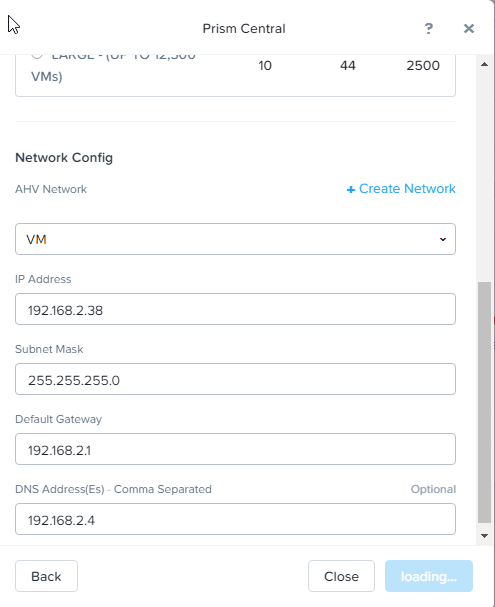
Scroll down. Select the AHV network we created in an earlier step on the dropdown menu, Then fill out the network information.
Click Deploy. It will take 30 -45 min so this is a perfect time to go get a cup of coffee or a snack.
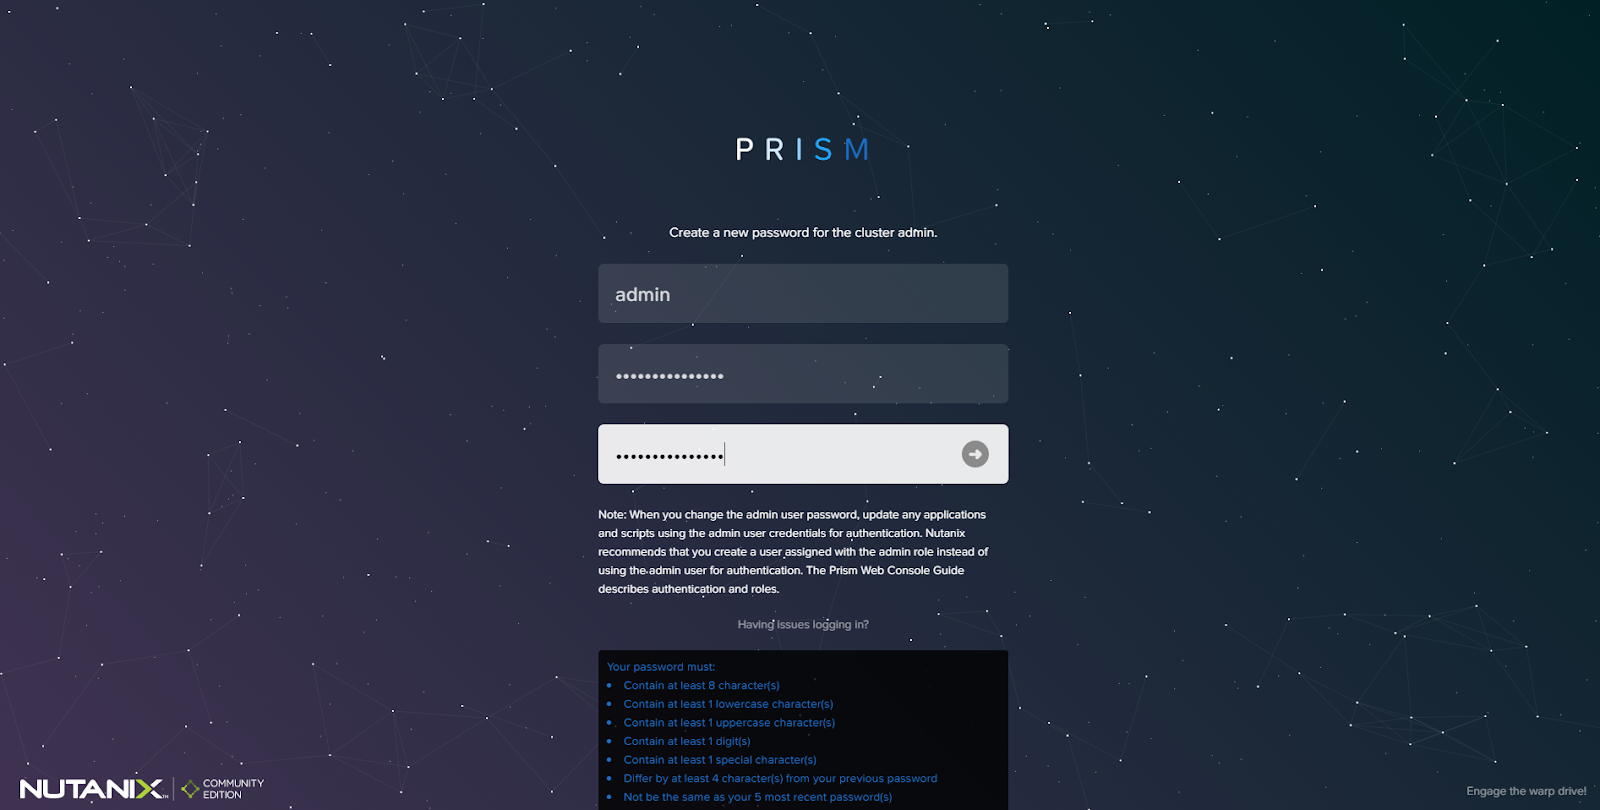
Once the prism Central VM has been deployed (you can click on the task icon on the top of the main menu to check the status), go to the https://prismcentral_ip:9440). Login with admin Nutanix/4u (note the capital N).
The next screen will prompt you to change the password.
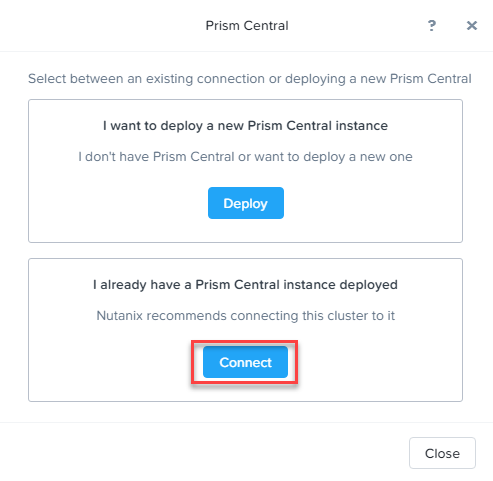
Now we need to add Prism Central to Prism Element. Go back to https://cvm_ip:9440) and click on the Prism Central widget.
This time click on the Connect button.
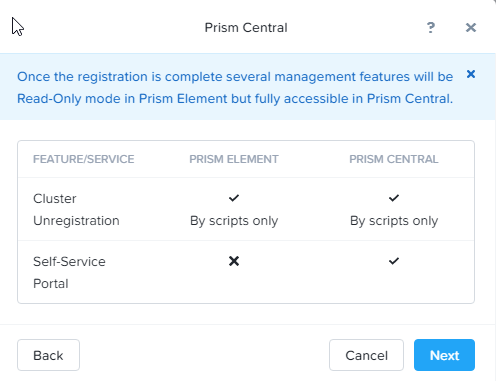
Click Next.
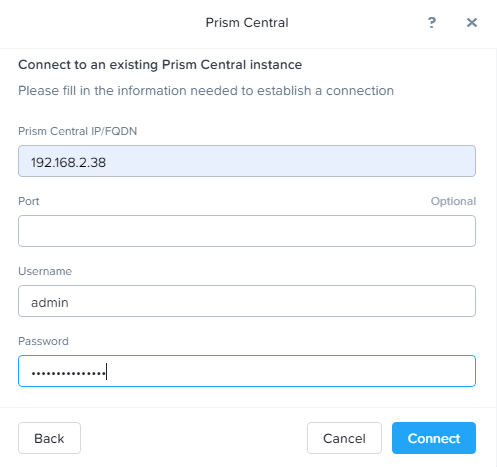
Type in the Prism Central IP, admin user and the password you just reset for Prism Central. Then click Connect.
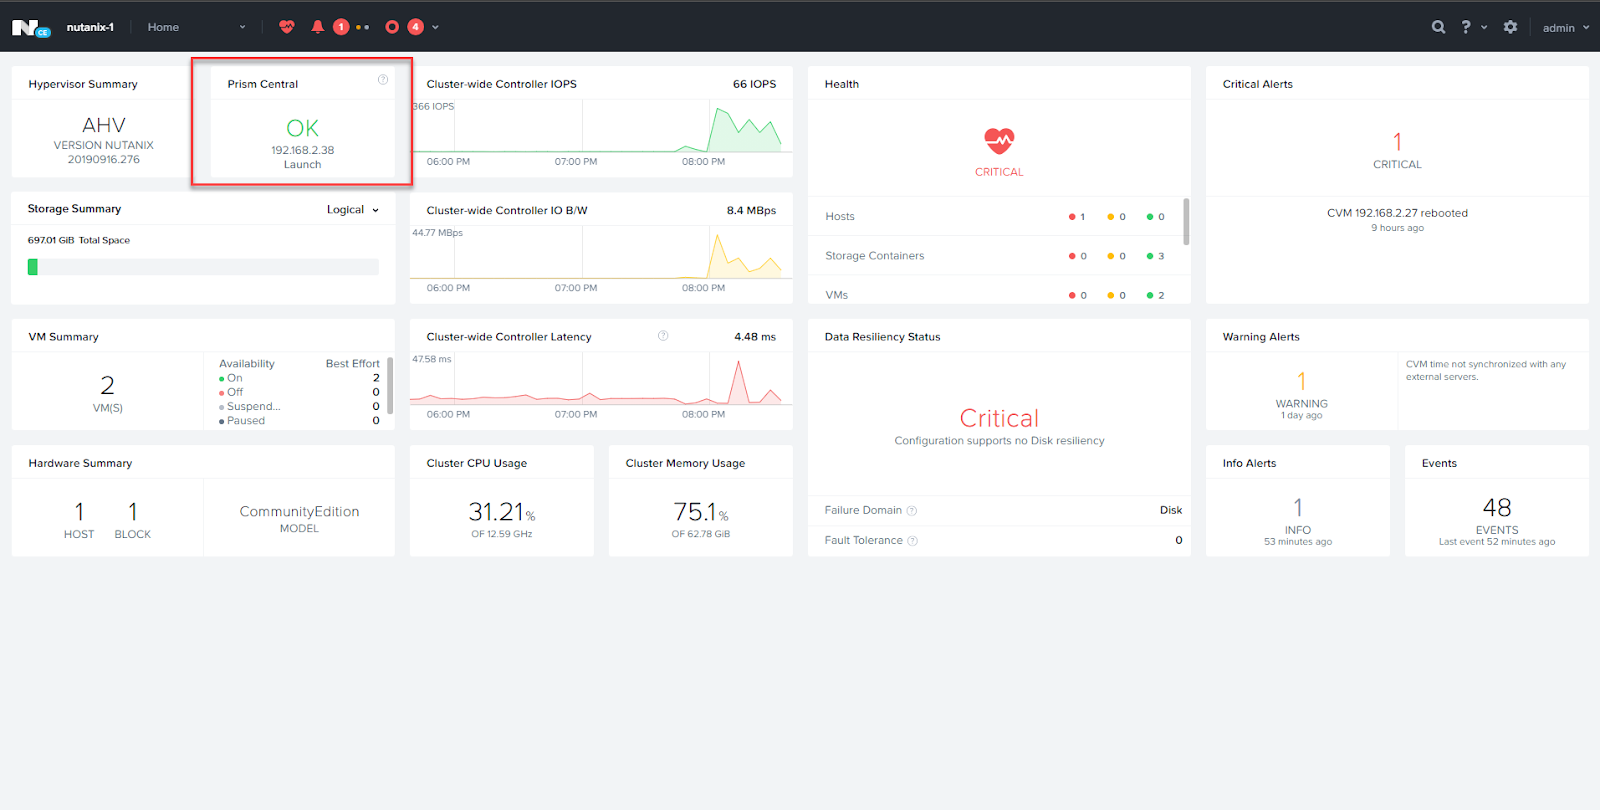
Once this is complete you will see an OK on the Prism Central widget
We are almost done, Login to Prism Central and enter your NEXT login information.
Congratulations, you have deployed Prism Central. Now you can deploy a second cluster using the same procedures so you will be ready to set up Leap (disaster recovery) on my next Nutanix blog.
I was looking for an easy way to set up a Nutanix lab environment so I could try out some configurations without affecting my production environments. If you haven’t had the chance to try out the Nutanix Community Edition, it is now even easier to install. Previous versions were distributed as a disk image and now it is a bootable iso.
I’m going to walk through the high-level steps to get Nutanix CE up and running in a nested environment on VMware ESXi 7.0. I will be creating a single node cluster, so we will need the following prerequisites
- 2 available static IPs
- The port group needs to have promiscuous mode, MAC address changes, forged transmits enabled
Download the ISO from:
https://next.nutanix.com/discussion-forum-14/download-community-edition-38417
*If you do not have a Nutanix account, you will need to create one
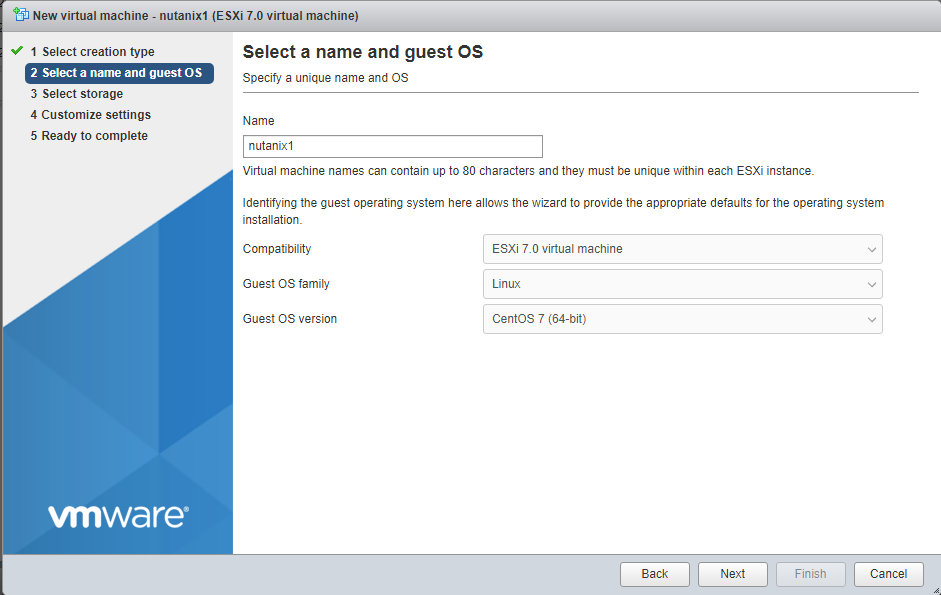
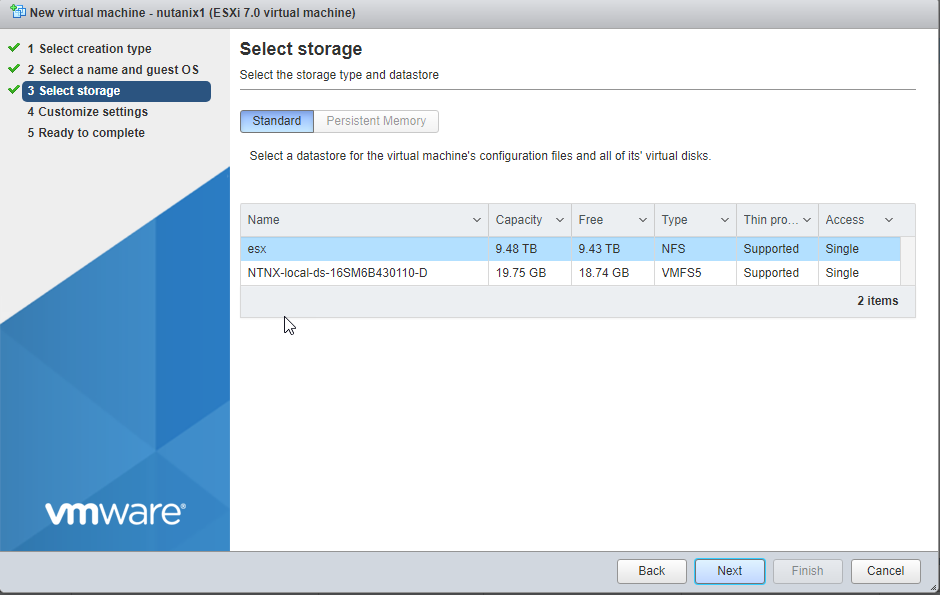
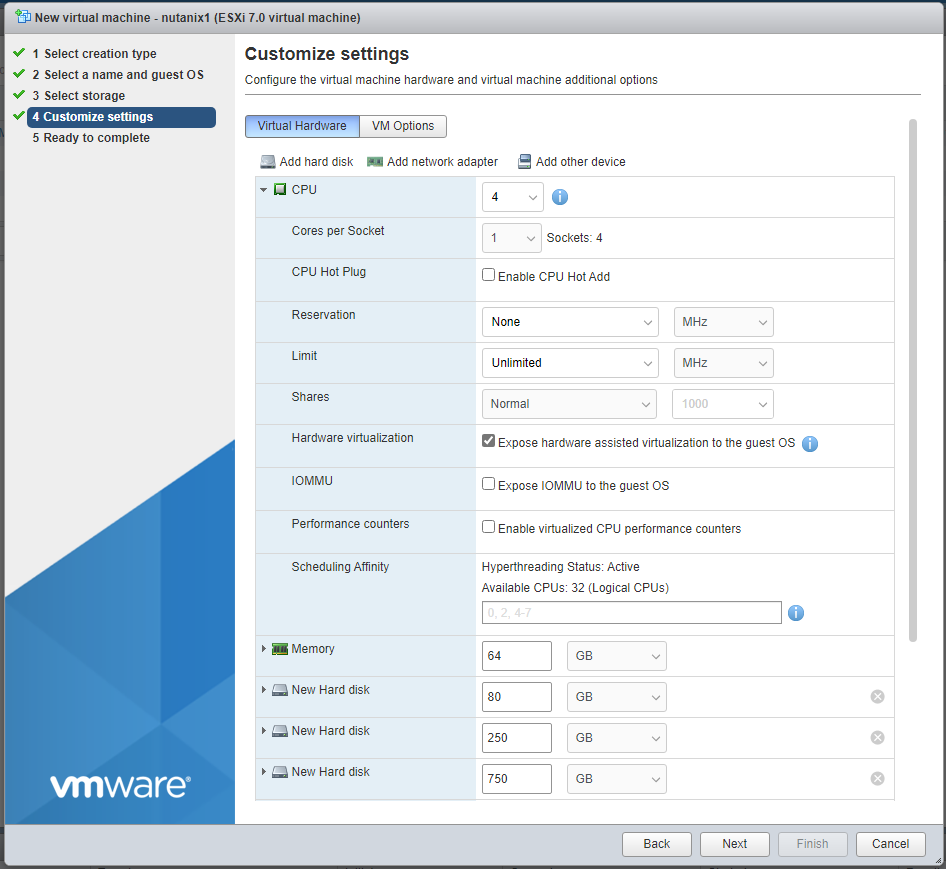
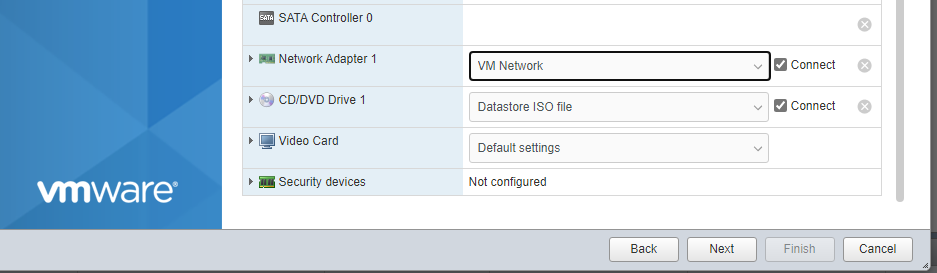
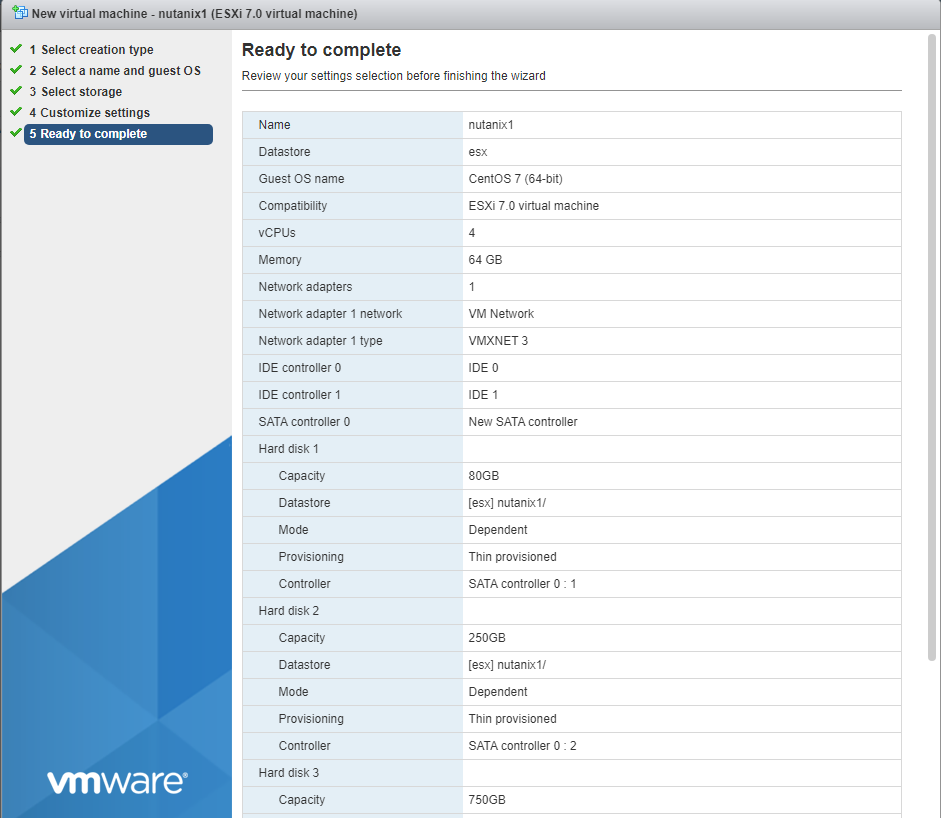
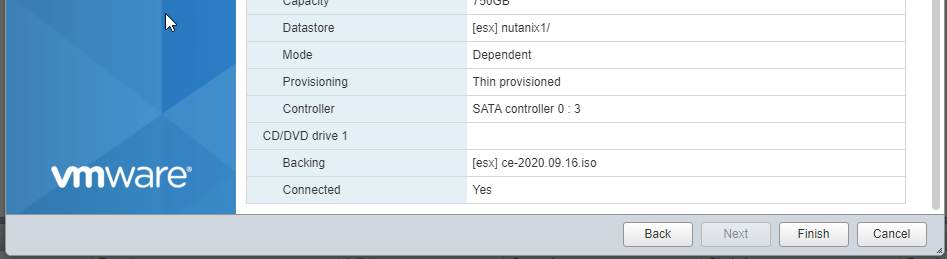
Create a VM on ESXi with the following configuration (see screenshots below for more detail). These settings worked for me, but feel free to experiment.
- 4 vCPU (6 vCPU if you are going to deploy Prism Central in the future)
- CPU Hardware virtualization enabled
- 64 GB
- 32 GB SATA hard disk
- 250 GB SATA hard disk
- 750 GB SATA hard disk
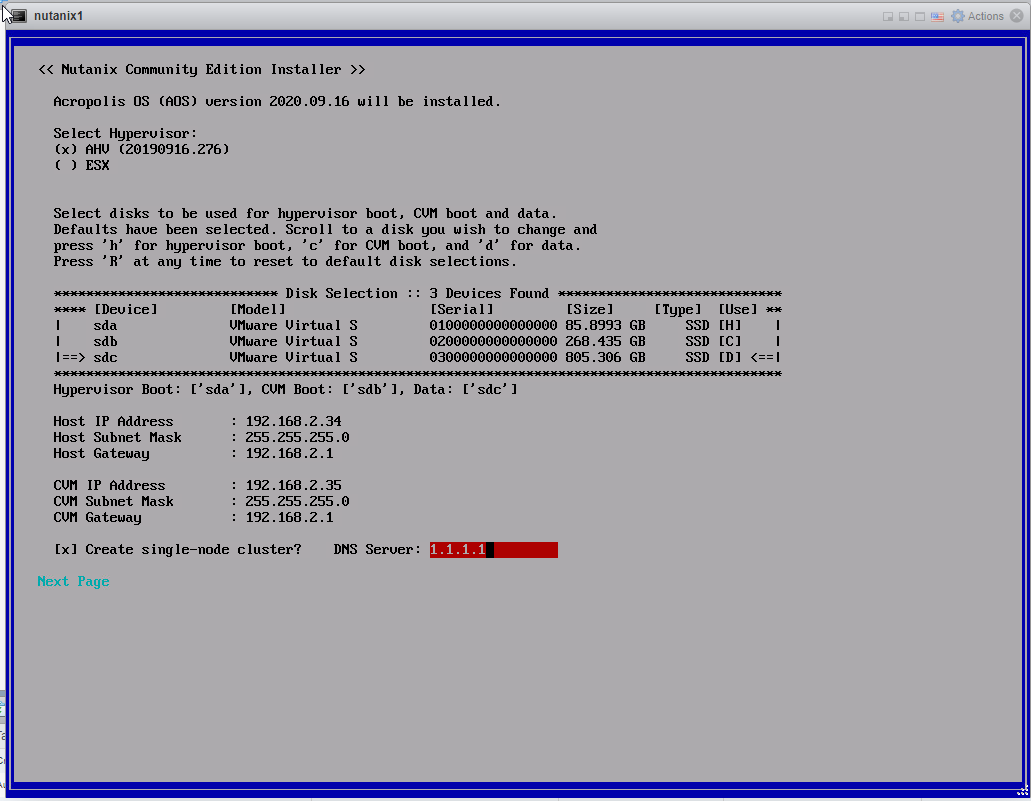
We are almost there. Select AHV as the hypervisor. We will be using sda as the boot, sdb as CMV, and sdc as data.
Remember the 2 static IPs that we needed? Enter them in and be sure to remember which one you used for the CVM
Check the “create single-node cluster” box and enter a valid DNS server IP.
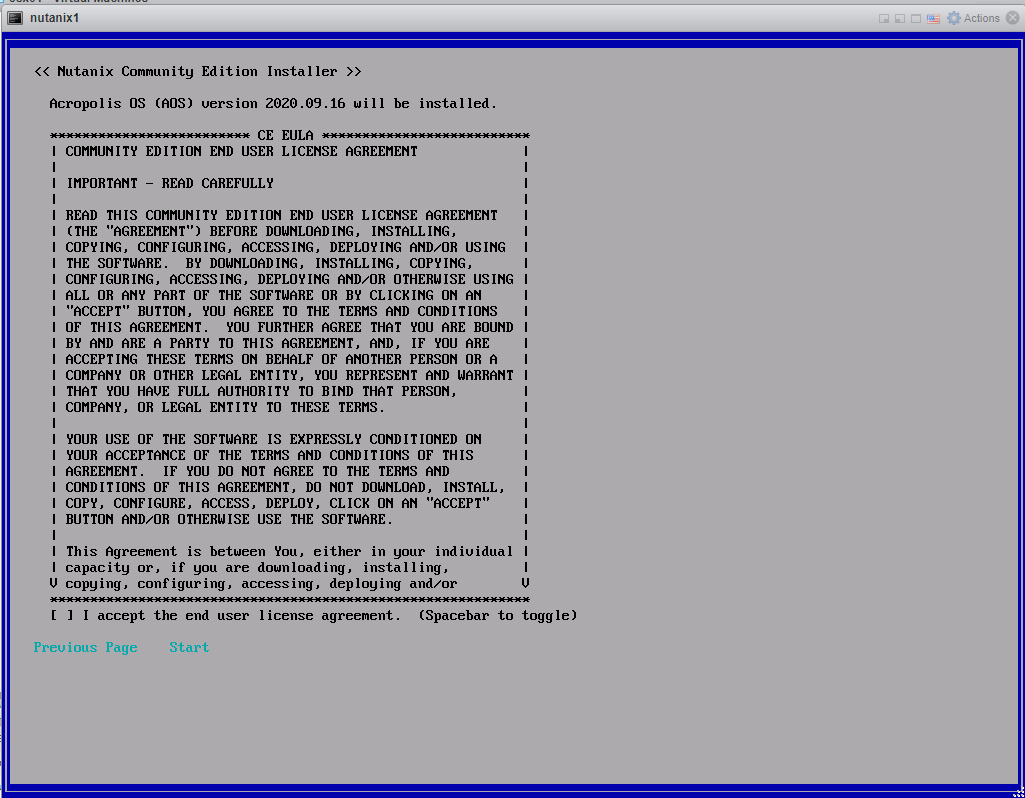
Scroll down to the bottom of the license agreement and accept it.
Select start and go get lunch.
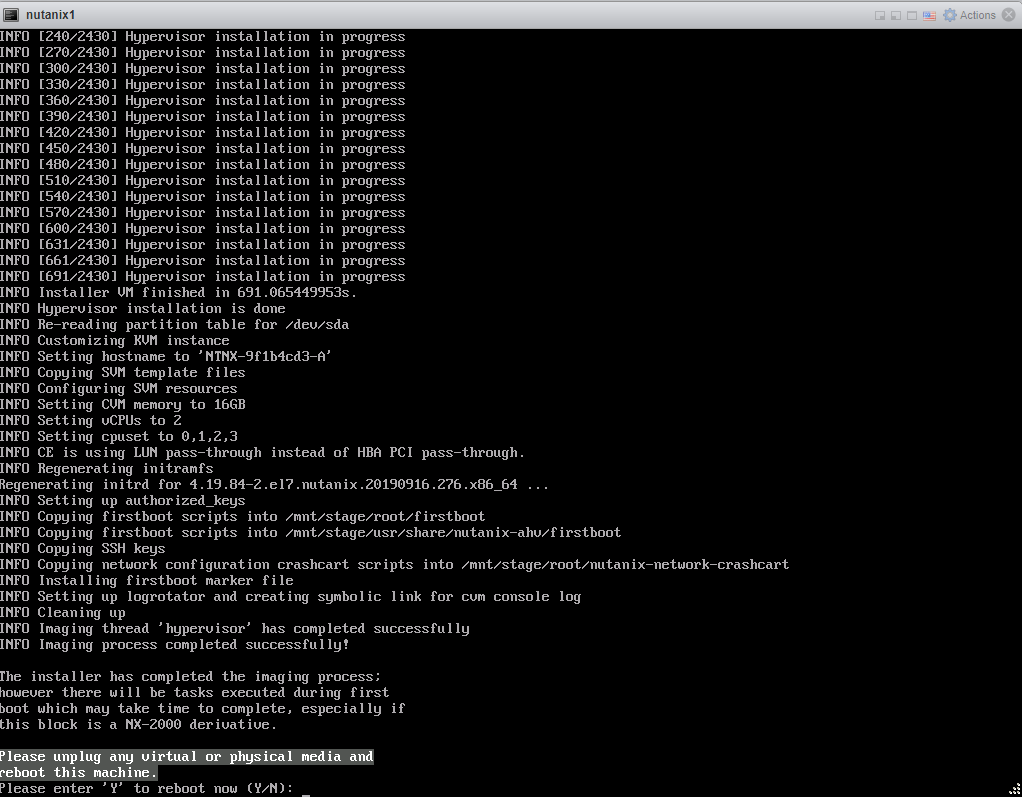
Once the install is complete enter ‘y’.
Go get some coffee. It takes a while for the CVM to start up since we aren’t giving it a ton of memory.
Go to the IP address you configured for the CVM on port 9440 (ie https://cvm_ip:9440)
Congratulations for making it this far. You are so close to getting to witness the awesomeness of Nutanix.
My next blog posts will outline the post install configuration, creating a VM, and finally installing Prism Central
When I heard at VMworld 2020 there was a fling for ESXi on ARM I was very excited. I have several Raspberry Pis deployed for various functions around the house so I thought this would be the perfect excuse to buy a shiny new 8GB Raspberry Pi4.
The documentation flings.vmware.com/esxi-arm-edition was great, however, I ran into two issues….
The Raspberry Pi 4 does not play nicely with all HDMI monitors
I couldn’t see any video while the Pi was booting up. I tried two different monitors and that didn’t help. The fix was adding the following line to the config.txt file on the root of the SD card
hdmi_safe=1Don’t be tempted to use a cheap USB drive for the ESXi install media
The install media is less than 1GB, so I thought I would use one of the many small USB drives that vendors hand out like candy. This led to getting I/O errors and the install failing. I tried another no-name brand USB drive and the same thing happened. I finally tried a Kingston USB drive and the install completed.
Welcome to my first real blog post.
This is a simple Ansible playbook to update iLO firmware on HPE servers. The only prerequisite is that you need a webserver to server up the firmware file. As an Ansible rookie, it took me a while to figure out I needed to use raw commands since iLO doesn’t have a traditional shell.
If you are looking for a good place to start with Ansible, check out Jeff Geerling’s YouTube channel
https://www.youtube.com/user/geerlingguy
and here is the playbook….
---
- hosts: hp_hosts
  gather_facts: no
  tasks:
  - name: CHANGE DIR
    raw:  'cd /map1/firmware1'
  - name: UPDATE FIRMWARE
raw: 'load -source http://webserver/ilo.bin'Welcome to my blog where I will share my experiences with virtualization, datacenter intrastructure and the cloud
Recent Comments